Adding Expenses
Expenses can be added against tasks. Each expense can have multiple line items. Each line item can be assigned an expense code like Travel, Food etc.
To add an expense, Top Menu ▸ ▸ Expense. Alternatively, you can also click on a task and from the task screen click ▸ .

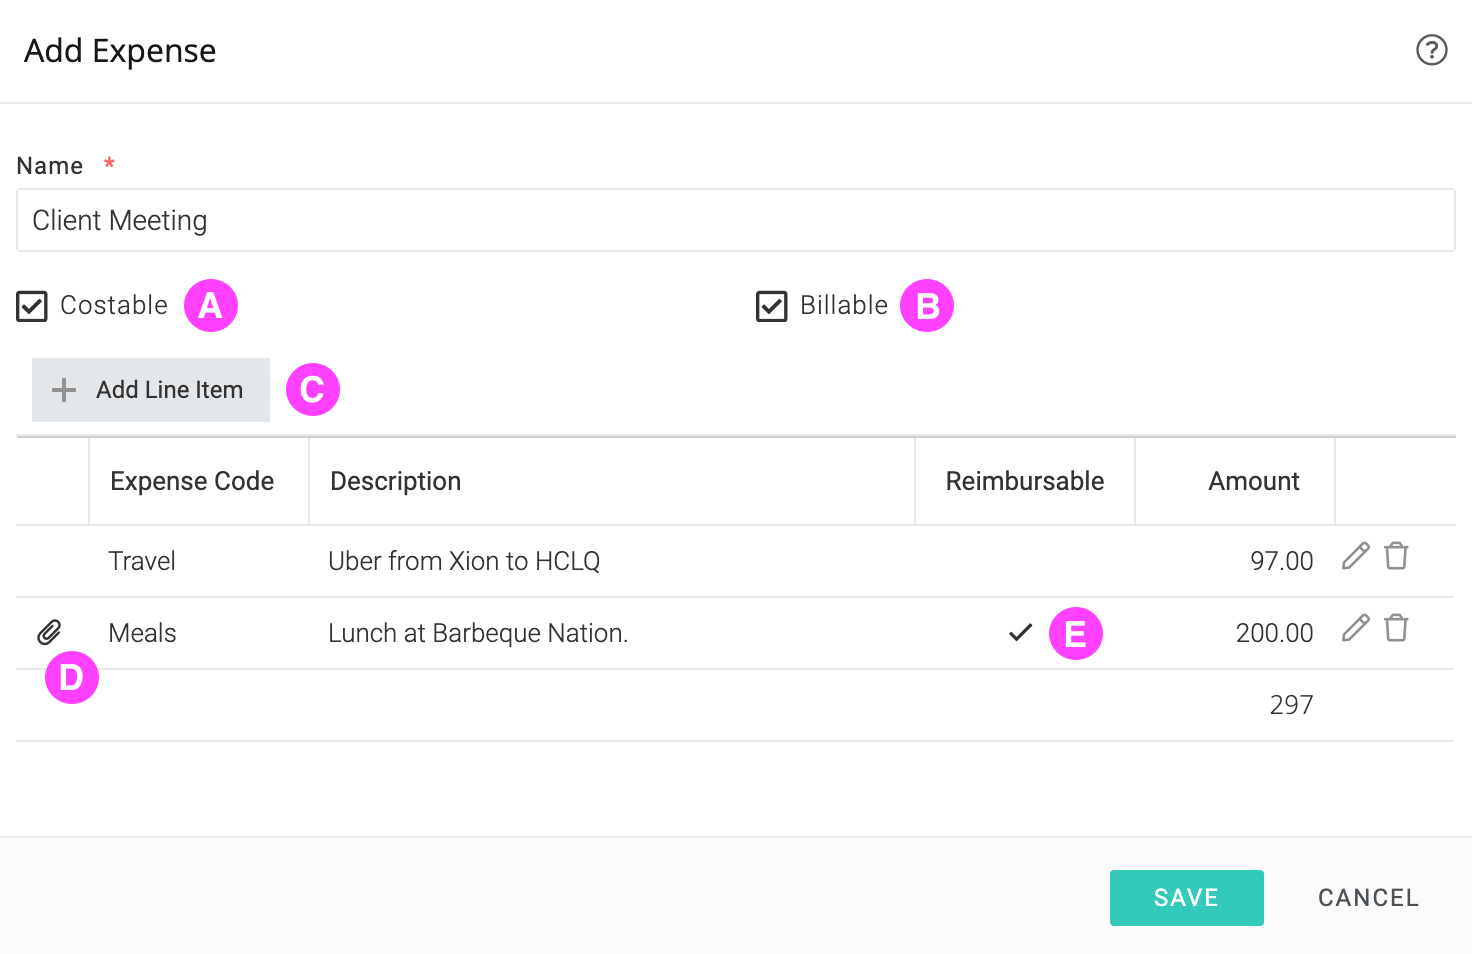
| A | If marked as costable, the total of the expense will be added to the task cost (and project cost) after the expense is approved. |
| B | Indicates that the client will pay for it. If marked as billable, the total of the expense will be added to the task revenue (and project revenue) after the expense is approved. |
| C | Click to add a line item |
| D | Indicates that a receipt has been uploaded for the line item. |
| E | Reimbursable means that the submitter has to be reimbursed for this item. The next line item has probably been paid by using a company credit card and hence not required to be reimbursed. |
Task and project financials are updated only after an expense is approved.